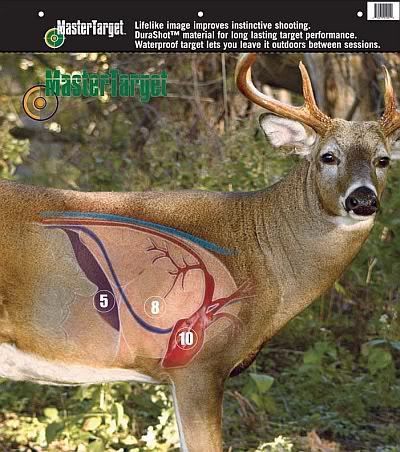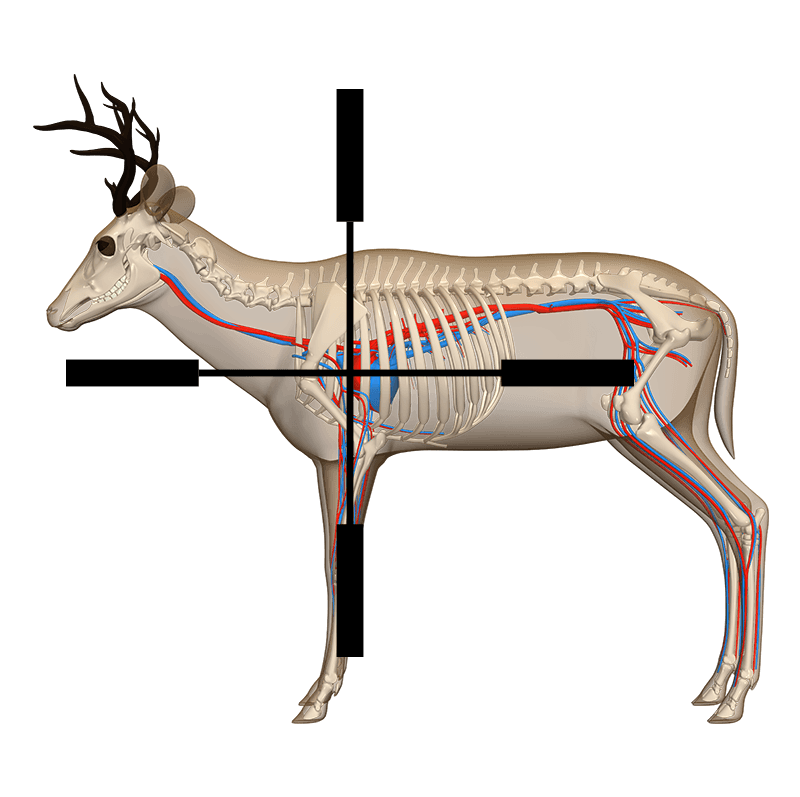
The Dead-Zone Paradox: Shot Placement Deception on Big Game
On the eighth day of a 10-day September archery elk hunt in southwestern Montana, I, a nonresident due to skyrocketing housing prices, joined a friend. We tirelessly covered endless country, interrupted only by a few encounters and the unrelenting afternoon heat.
While hiding behind a spruce tree, we spotted a cow elk moving along the ridgeline. Anticipating a bull, I positioned myself ahead. A bull soon appeared, walking towards me on the ridgeline. The set-up was perfect. Concealed by the tree, I calmly drew my bow and released the arrow as the bull emerged from behind the trunk, piercing its left shoulder. The bull stumbled instantly, and we couldn’t help but smile.
However, the bull didn’t fall. It slowly walked away, standing in a stand of downed timber for what felt like an eternity. Through binoculars, I searched for an exit wound, but only saw fletching sticking out of its right flank. I held onto hope that the arrow’s injuries would prove lethal. We waited anxiously for the bull to collapse while bugles echoed around us.
After an hour of waiting, the mountain filled with the sound of spooked elk, and the bull disappeared. It was a hunter’s worst nightmare.
As someone who takes pride in shot placement and spends the off-season honing my skills, this was a humbling experience. I practiced challenging shots under various conditions, but this setup required none of that. I was calm, unburdened by a backpack, and in good physical condition. The animal was relaxed as well. It seemed like the perfect opportunity.
We made a tremendous effort to track the bull, but we never found it. The reality sank in: I had misjudged the shot angle.
Real-World Education: Understanding Shot Placement
Early on, hunters learn that the most lethal area to target on a big game animal is just behind its shoulder, assuming a broadside position. While this advice is valuable, it doesn’t always apply. Failing to adapt to different presentations is often a recipe for disaster.
Shot-placement geometry is especially crucial for archers. Though not a master of geometry, I recognize the significance of the angle at which a trajectory cuts through the abdominal or thoracic cavity’s organs.
Thankfully, most mammalian species share similar anatomical layouts, which means archers don’t have to learn shot placement for each species individually. However, it’s crucial for archers to acknowledge the variations that exist among big game animals. Imperfect shot placement may be forgiven in certain situations and for certain species, but it can haunt those who hunt multiple types of game.
As a zoologist, my day job allows me to study vertebrate anatomy. After that frustrating hunt, I participated in elk immobilization for a veterinary examination. Elk always leave me in awe with their size: long legs, massive chest, and a tremendous amount of blood. Oddly enough, despite the bigger target, the margin for shot placement error remains small.
Allometry is the relationship between an organism’s size and its physiological, morphological, and life history characteristics. Anatomically speaking, larger animals have more tissue, which requires greater oxygen and blood supply. Larger lungs and a bigger pump (heart) are needed to distribute the blood volume throughout the body. So, when everything is big, how does the margin for error remain small?
Vital organs are not evenly distributed within big game animals. The likelihood of hitting these organs is higher in smaller species due to spatial constraints. Smaller animals have their organs and blood vessels confined in a smaller space, making it relatively more possible for an arrow to bisect an essential organ or blood vessel.
On the other hand, larger animals offer more chances to hit non-lethal spaces within an organ. As animals grow in size, so does the amount of non-lethal space. This applies not only between species but also between sexes of the same species. Surprisingly, smaller living targets are often more forgiving than larger ones. This becomes particularly relevant when hunting from an elevated platform where the angle is both vertical and horizontal. A miscalculation in the animal’s angle relative to the trajectory can lead to devastating consequences. Even if your placement appears good, your shot can narrowly miss lethal tissue and bisect nonlethal dead space.
Targeting Multiple Vital Locations
The most effective harvests aim for multiple vital locations. A shot that damages both lungs and the vena cava (a large vein that delivers blood to the heart) is more effective than one that only reaches the lungs. Similarly, a shot that injures both the diaphragm and the liver is more effective than one that only hits the liver.
When an animal is injured by archery equipment, blood loss is the primary cause of death. This is evident in the animal’s staggered gait due to the sudden drop in blood pressure resulting from injury to a major blood vessel. Those vessels in the thoracic cavity are the most vulnerable in all species.
Even essential organ tissues can survive traumatic injury. An animal with enough perseverance could survive a trajectory that bisects both rear lung lobes with a full pass-through, especially if their blood forms a lifesaving clot. Although organs like the lungs and liver have intricate networks of blood vessels, not all injuries to these organs are equal. An animal can potentially survive long enough to outsmart a skilled tracker or even completely heal.
The measure of a successful harvest lies in swift and efficient lethality. To avoid the frustration of improper shot placement, hunters should aim for a target that inflicts a devastating series of injuries. Poor shot placement due to miscalculated angles is a common cause of nonlethal shots. Furthermore, accurately interpreting the angle of a trajectory provides valuable insight into the wounded animal’s behavior and the timeline for tracking it.
To overcome the dead-space paradox, practice shot placement from various angles during the off-season. Evaluate your shots based on the number and vitality of organs affected. The more you practice, the better prepared you’ll be for any angle you encounter while hunting.
In my case in Montana, I miscalculated not only how much the animal was quartering towards me but also the fact that it was descending a ridgeline above me. Even though my arrow hit behind the front left shoulder, it exited a full 20 inches behind the entry wound and 6 inches higher. Don’t be deceived by a flawless entry wound or a satisfactory exit wound; what matters is the path between the two.
| WIDTH | OF | ANIMAL | ||
| QUARTERING ANGLE | 15 inches | 20 inches | 25 inches | 30 inches |
| 5° | 1.3 | 1.8 | 2.2 | 2.6 |
| 15° | 4.0 | 5.4 | 6.7 | 8.0 |
| 30° | 8.7 | 11.6 | 14.5 | 17.3 |
| 45° | 15 | 20 | 25 | 30 |
| 60° | 26 | 34.7 | 43.3 | 52 |
This table illustrates the distance from entry wound to exit wound, in inches, along a single axis in big game animals of different girths. The change in angle represents a rotation in the target animal, where a broadside shot is 0 degrees. For example: A well-placed chest-shot on a doe (say, 15 inches girth) quartering toward the hunter at a 30-degree angle will exit the animal 8.7 inches behind the entry wound, through either the liver or the paunch. The distance between the entry and exit wounds can be applied to animals quartering toward and away, and in the horizontal and vertical angle, but the exit wound will be in front of or behind the entry wound based on the direction the animal is facing.

A skilled hunter, dedicated conservationist, and advocate for ethical practices. Respected in the hunting community, he balances human activity with environmental preservation.

